
 XEN Create
Optimising Website Organisation with HubSpot Content Hub's Site Tree Tool
A foundational feature of HubSpot Content Hub is its site tree tool, which provides a straightforward folder visualisation for all your pages....
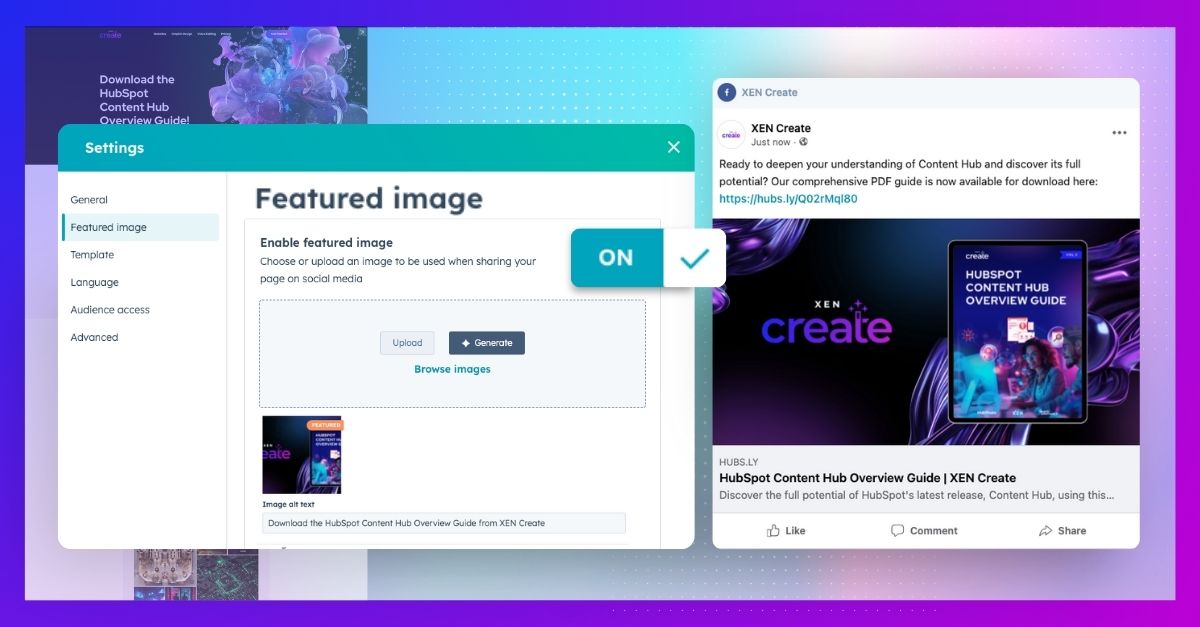
Let's start by understanding what a featured image is and why it's important, especially if you're new to website creation.
Featured images serve as thumbnails that appear when website pages, landing pages, or blog posts are shared on social media platforms.
Here are some examples:
To add a featured image to your page or post, follow these simple steps:

Hover over your post or page and click on Edit.
In the content editor, click on the Settings menu and scroll down to find Featured Image.
Make sure that the Enabled Featured Image option is checked.
Add your featured image by clicking on Browse images or Upload. We recommend using an image with a size of 1200x628 pixels or an aspect ratio of 1.91:1.
For those interested in experimenting, you can also generate AI images by clicking on Generate or you can also use Midjourney. Check out our previous blog post to find out how to create Midjourney images and use them in your HubSpot portal.
In the Image alt text field, provide a brief description of the image. This description is important for search engines and screen readers. Also, make sure that your selected image displays the orange featured tag, indicating it as the chosen featured image.
You’re all done! Exit the settings tab and publish your page to ensure that your changes have been saved.
Interested in diving deeper into HubSpot Content Hub? Download our comprehensive PDF guide to deepen your understanding of Content Hub and discover its full potential! 
This resource is designed to be your ultimate guide to navigating the ins and outs of Content Hub, providing you with the insights needed to leverage its features effectively. Get your copy today!
You can also find this guide, along with our valuable resources, on our Resources page.
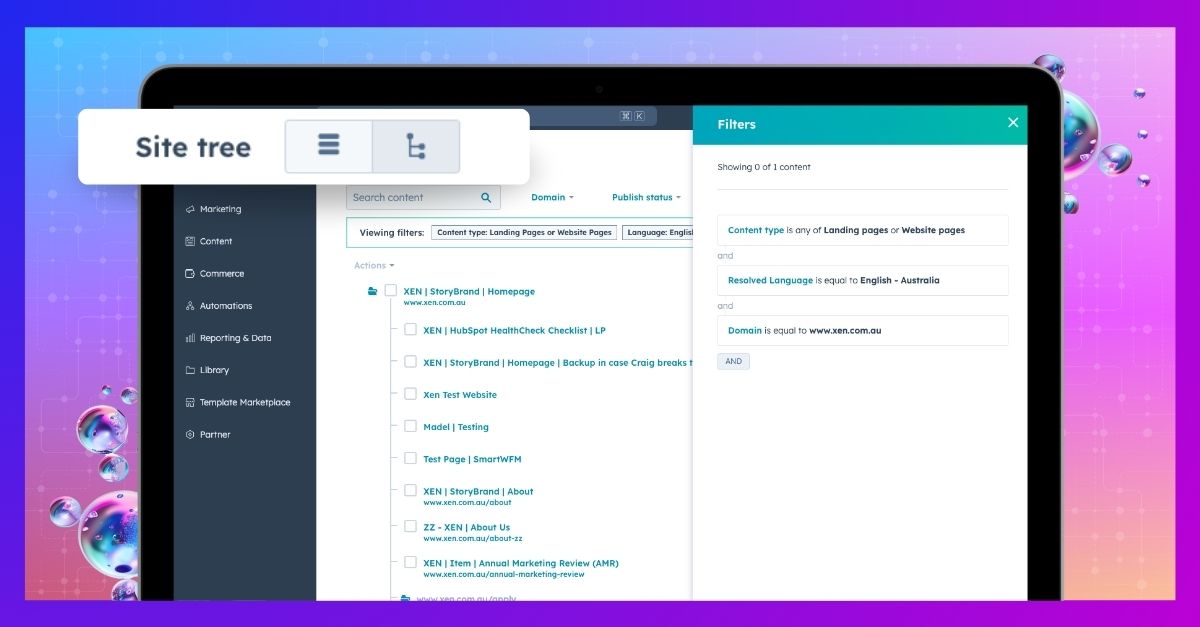
A foundational feature of HubSpot Content Hub is its site tree tool, which provides a straightforward folder visualisation for all your pages....
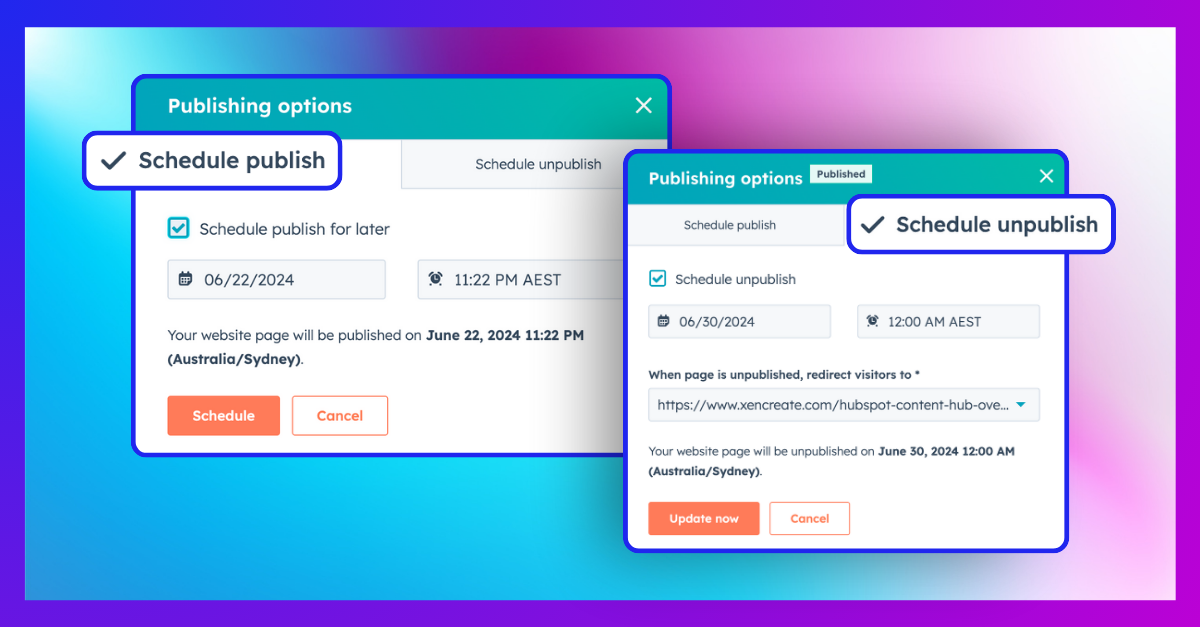
One of the most useful features in HubSpot Content Hub is Schedule Publish. If you're not familiar with it, this feature allows you to schedule a...
Designing pages in HubSpot can feel overwhelming, especially if you're new to the platform and still figuring out how all the modules, themes, and...