
Chapter 1:
Signing up to HubSpot
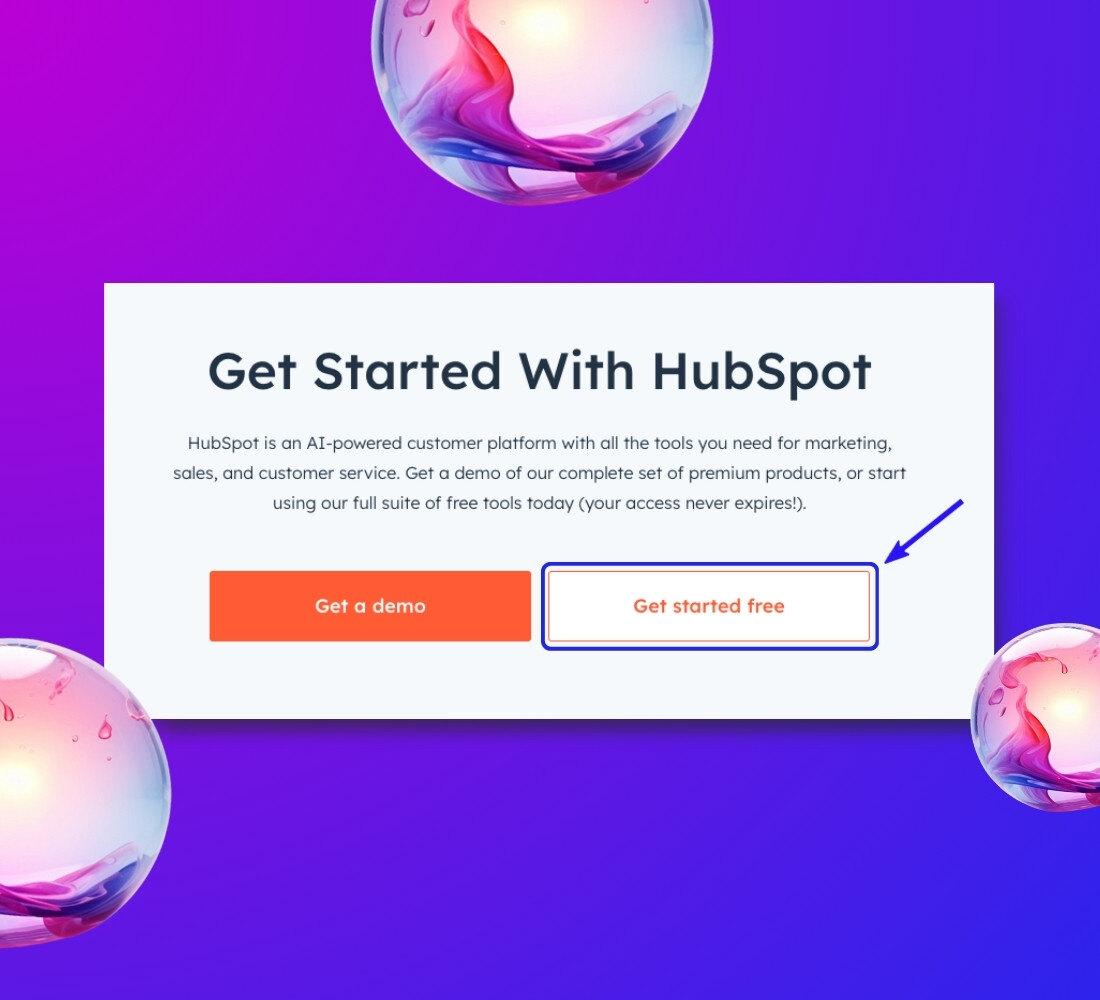
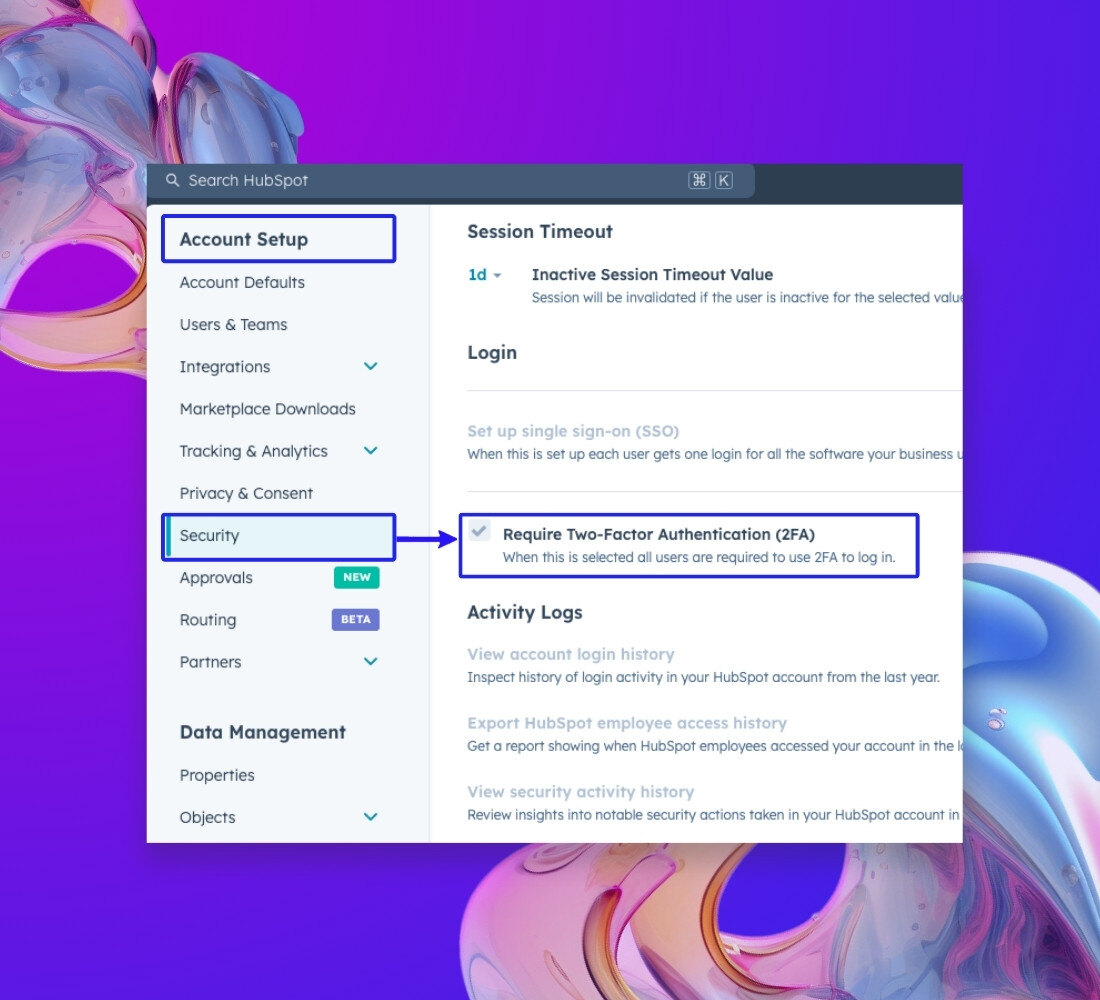
Welcome to the dynamic world of HubSpot! In the first chapter, we'll embark on the first leg of your HubSpot journey by walking you through the signing-up process. Additionally, we'll underscore the significance of account verification in ensuring your account's security.
Chapter 3:
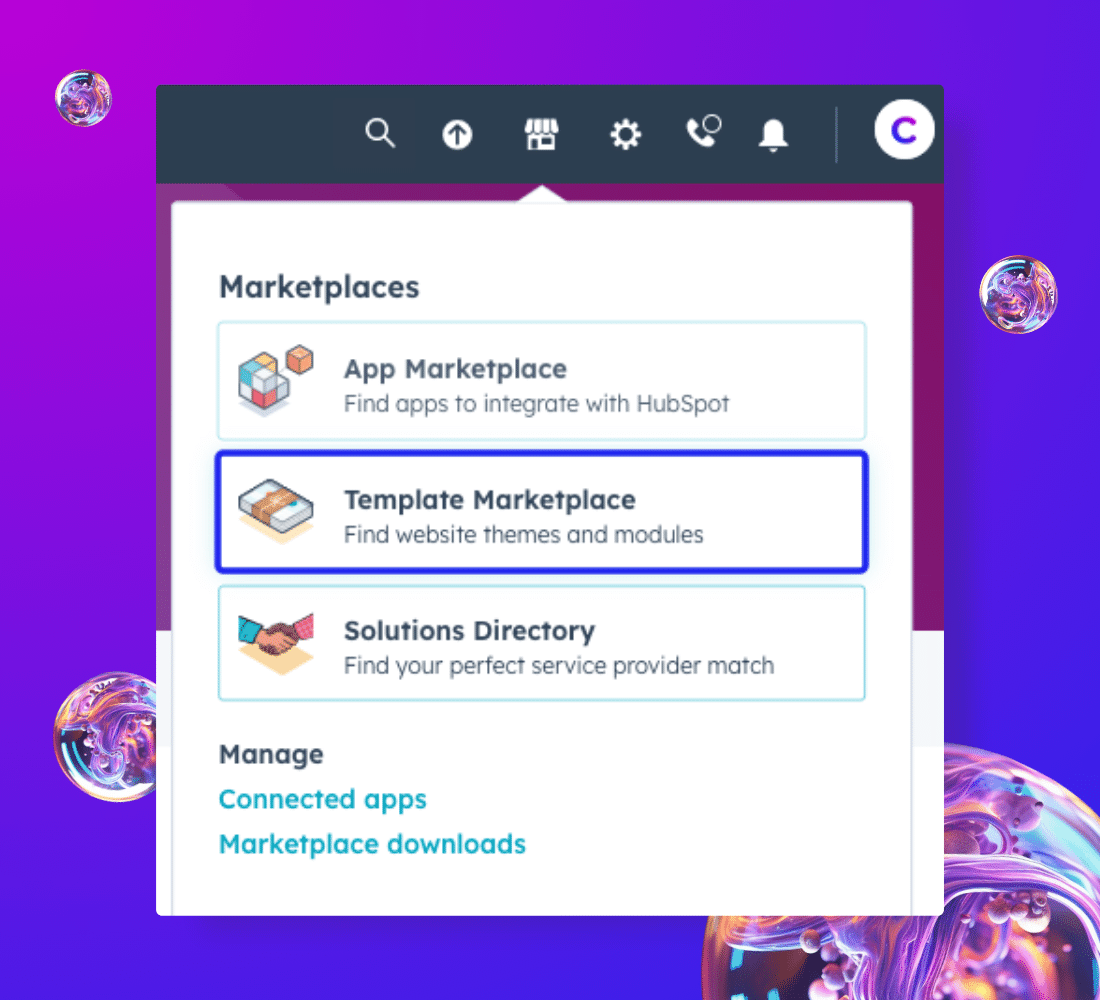
Downloading a theme from the HubSpot Asset Marketplace
Give your website a stylish boost by integrating themes from the HubSpot Asset Marketplace. This chapter guides you in navigating and selecting themes that suit your needs. Choose from free options or go the extra mile with paid ones.
Chapter 4:
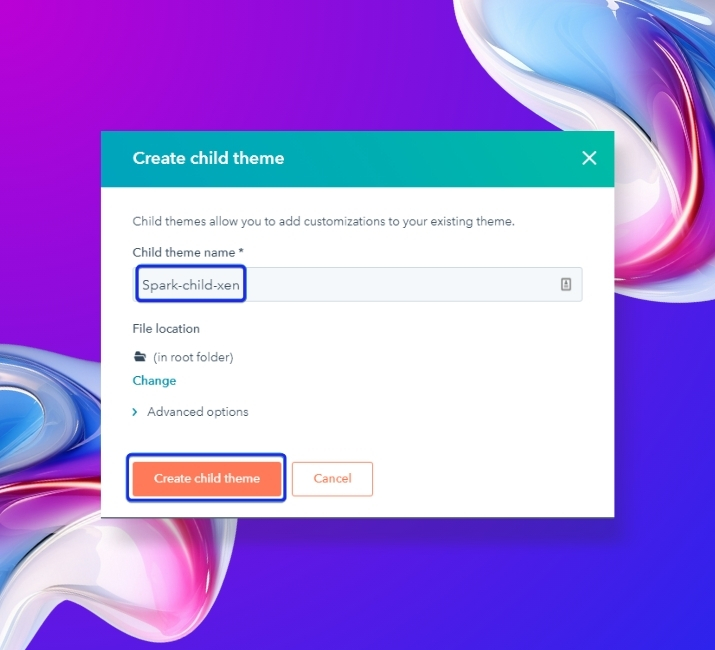
Setting up a child theme
Setting up a child theme is essential for those who seek to tailor their website's appearance without affecting the parent theme. In this chapter, you'll gain a comprehensive understanding of the process. You'll learn how to locate the theme you installed in the marketplace folder and create a child theme from it, ensuring a seamless and organized design journey.
Chapter 5:
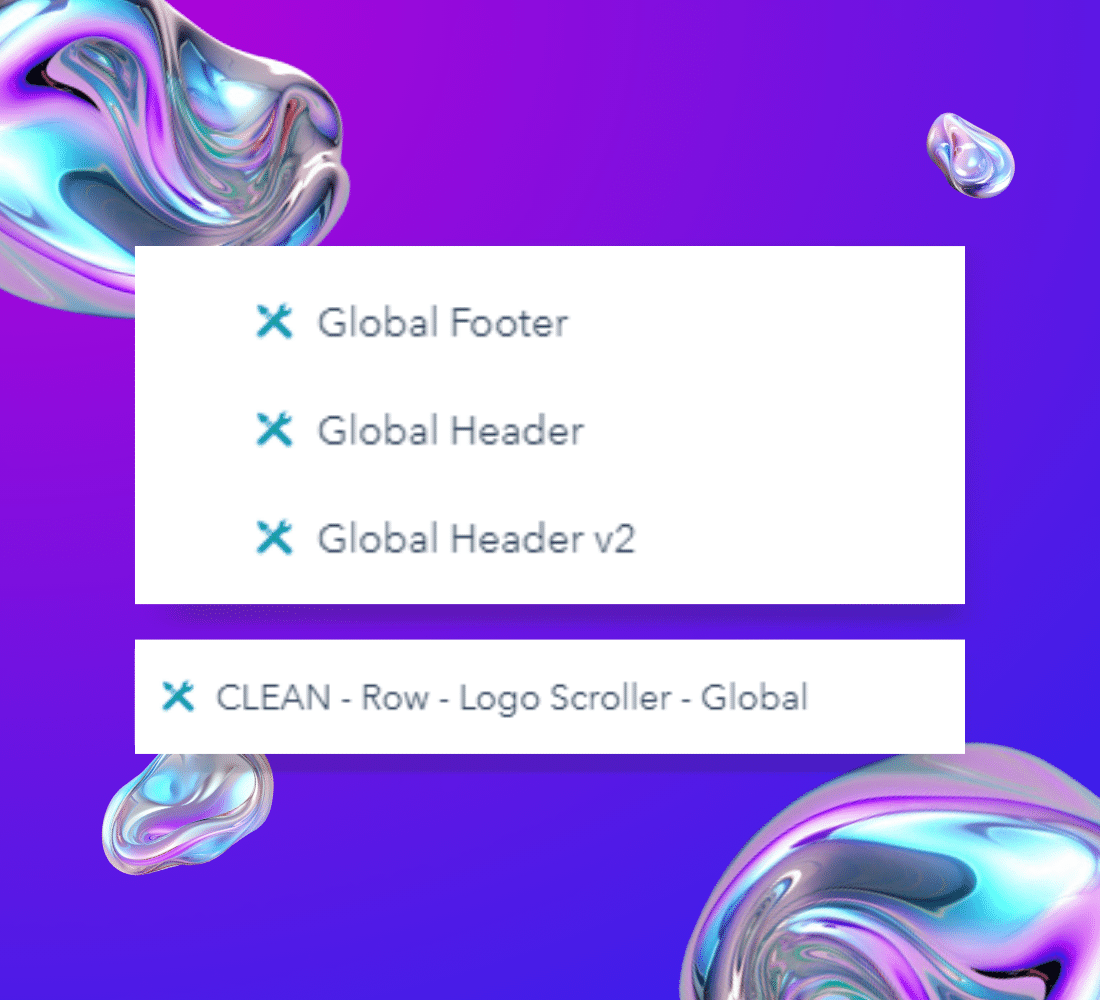
Setting up a Global module (optional)
If you’re interested in managing multiple websites within the same HubSpot portal, this chapter offers a roadmap. You’ll learn how to set up unique global modules, like headers and footers, for each site. While this step is optional, it provides valuable flexibility for branding and customization.
Chapter 6:
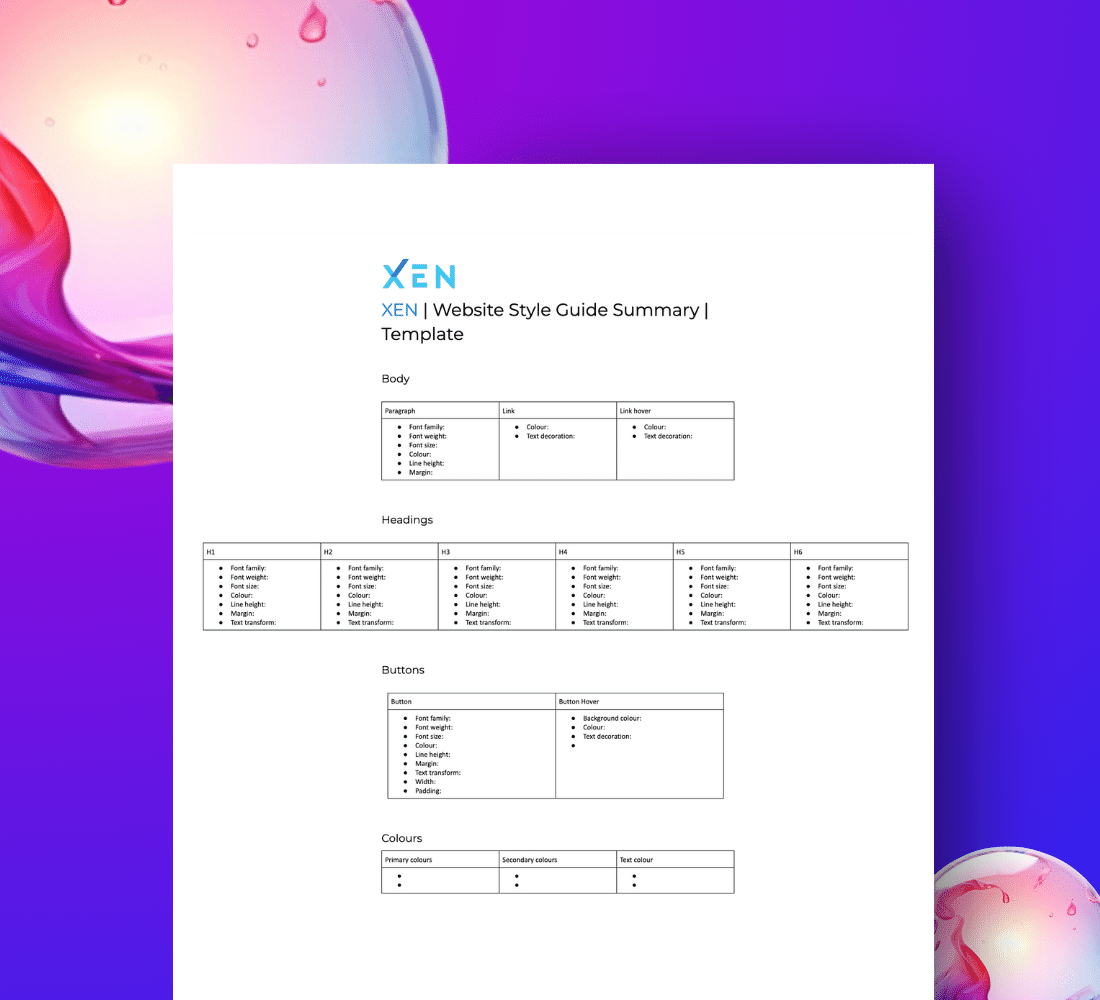
Documenting your brand’s style guide
A brand style guide is your roadmap to creating consistent and cohesive theme styles. In this chapter, you’ll discover why a well-documented guide is essential and get access to a handy template. By detailing key brand elements such as font family and colors, you’ll guarantee a unified and polished design for your website.
Chapter 7:
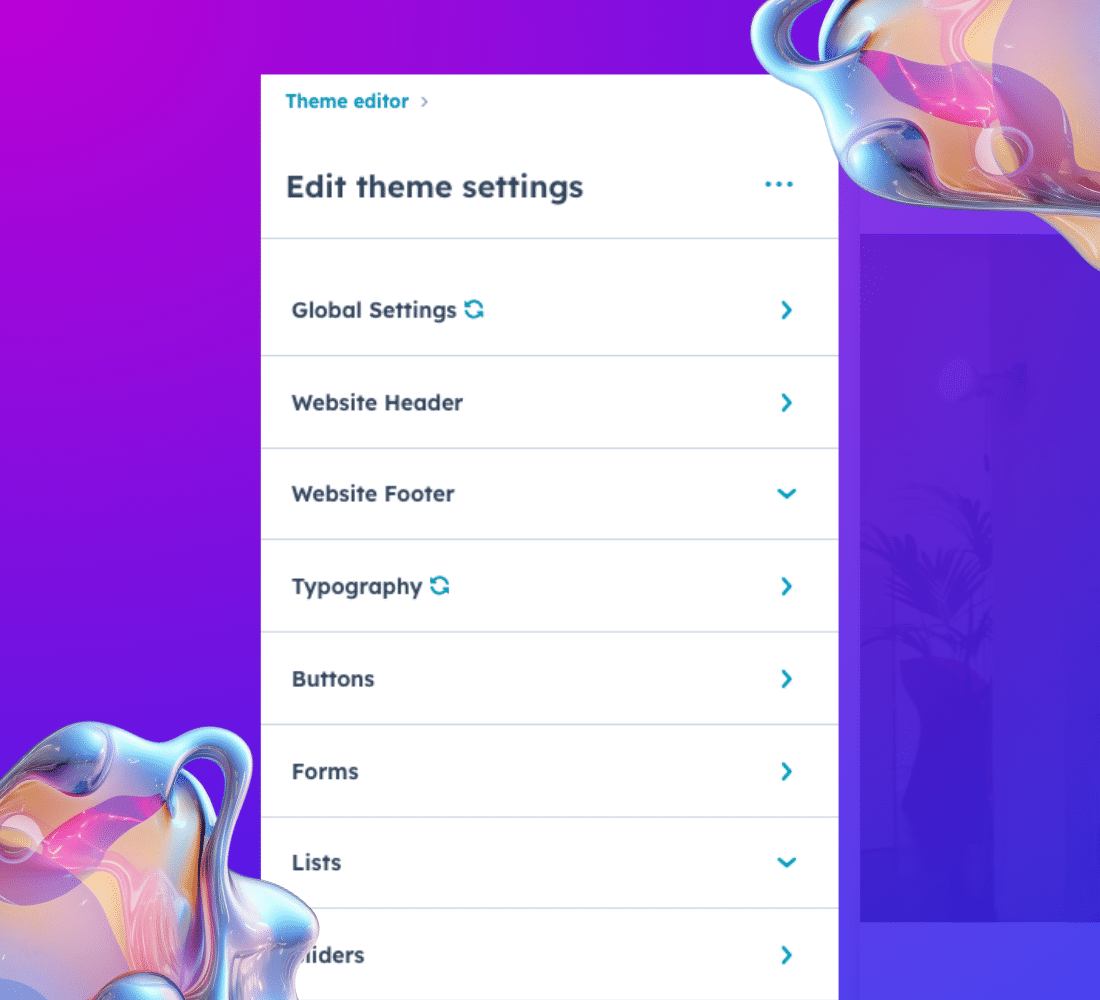
Setting up the theme settings
With your theme selected, it’s time to refine its settings to resonate with your brand’s identity. This chapter walks you through the customisation journey. Explore a variety of theme settings, from color schemes to typography and design elements, to ensure your website harmoniously aligns with your brand guide.
Chapter 8:
Uploading Custom Fonts (optional)
In this chapter, we explore how to integrate custom fonts into your website to perfectly match your brand's identity. HubSpot offers three options: selecting from their available fonts, browsing Google Fonts, or uploading a custom font. Our focus will be on the third option, guiding you through the process of adding your unique font.

Chapter 9:
Blocking your domain from Search Engines
For those who wish to keep their website hidden from search engines temporarily, this chapter outlines the process. You'll learn how to block your domain from search engine indexing and when to remove this block when your site is ready to go live
Chapter 10:
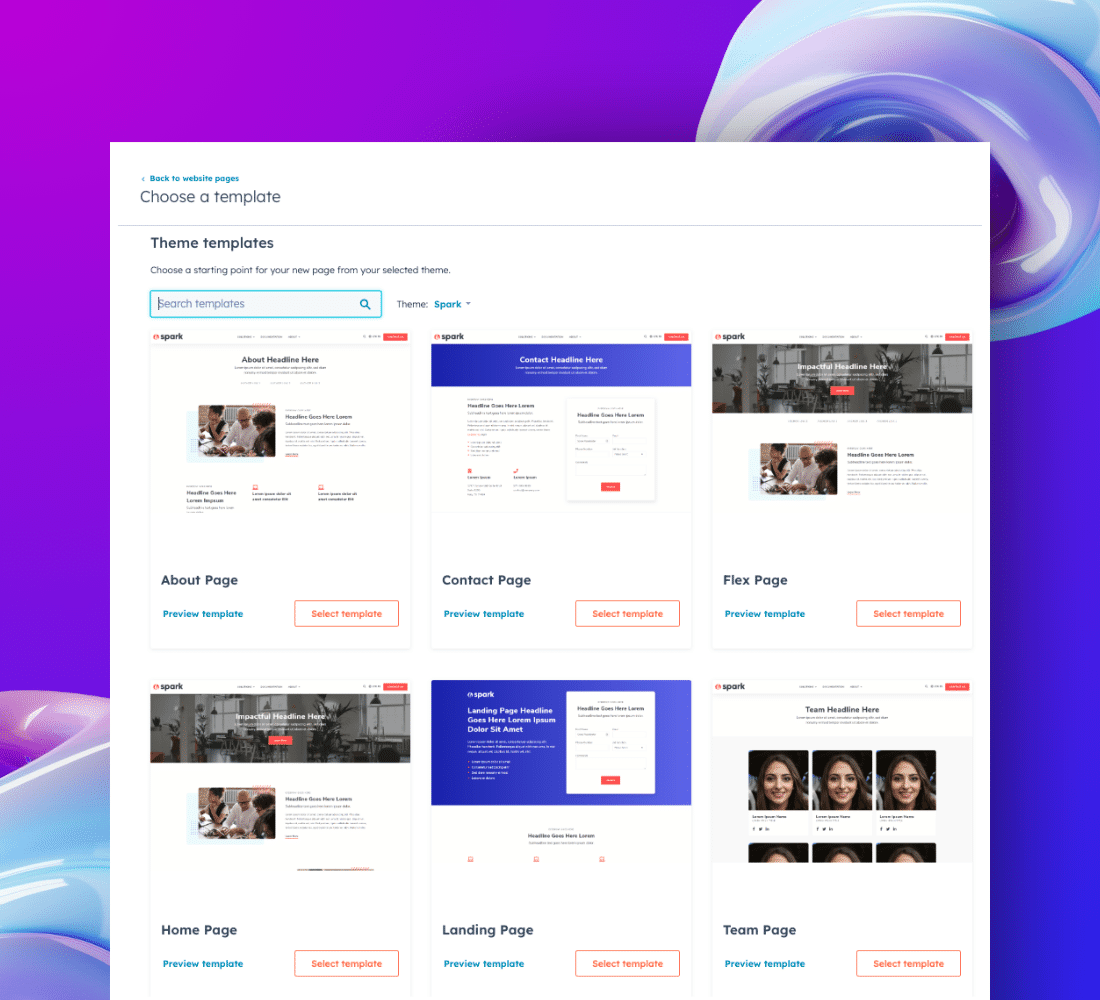
Start building pages
The chapter titled "Start building pages" marks a significant milestone in your HubSpot journey. You'll be introduced to HubSpot's user-friendly drag-and-drop editor, allowing you to create your website pages effortlessly. Topics include page naming, theme selection, and initial content creation.
Build Your Website Easily with HubSpot Today
Discover everything you need to know to create your own website using HubSpot in no time.
